DXC Solutions for DocuSign and Dynamics 365
Setup Parameters

Setup Parameters

The DocuSign parameters form is used to set up the connection between your Dynamics 365 environment and your DocuSign account. Within this form, you will set up the details regarding the administrator of the DocuSign account, along with a connection key that will be utilized when sending data through to DocuSign.
You can reach the parameters form by navigating to Organization administration > Setup > DocuSign > DocuSign parameters
Sign-in to the DocuSign admin portal.
Ensure that the user has been configured with admininstrator access.

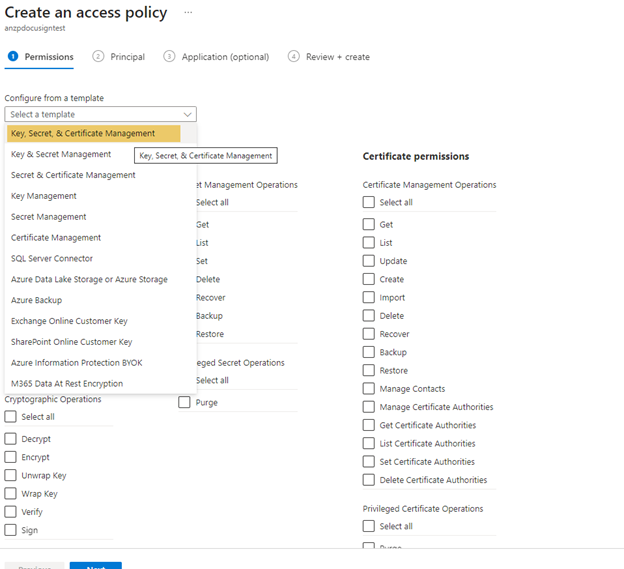
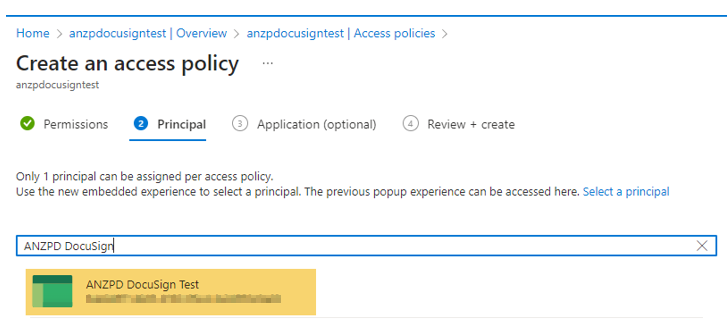
For authentication with OAuth2.0 the following configuration is required on DocuSign parameters:
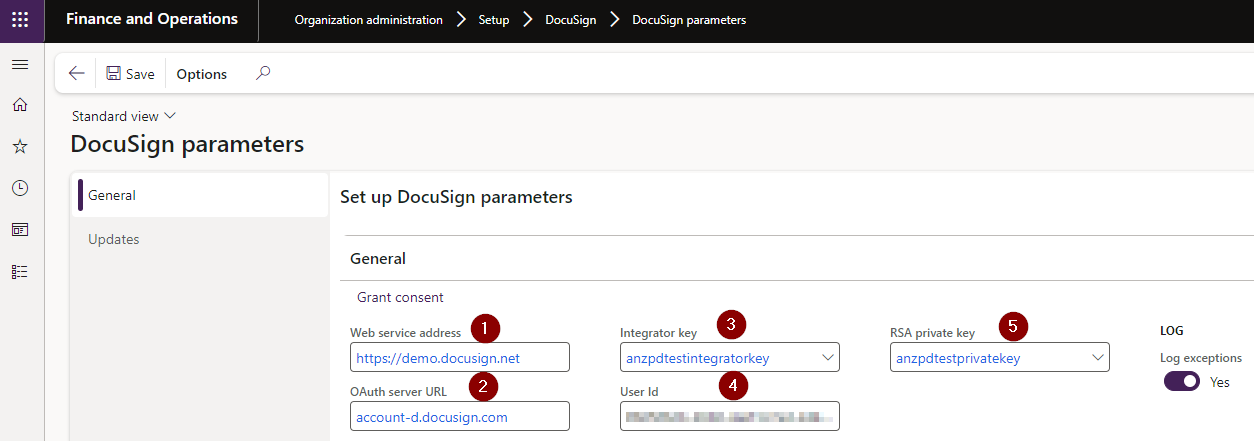
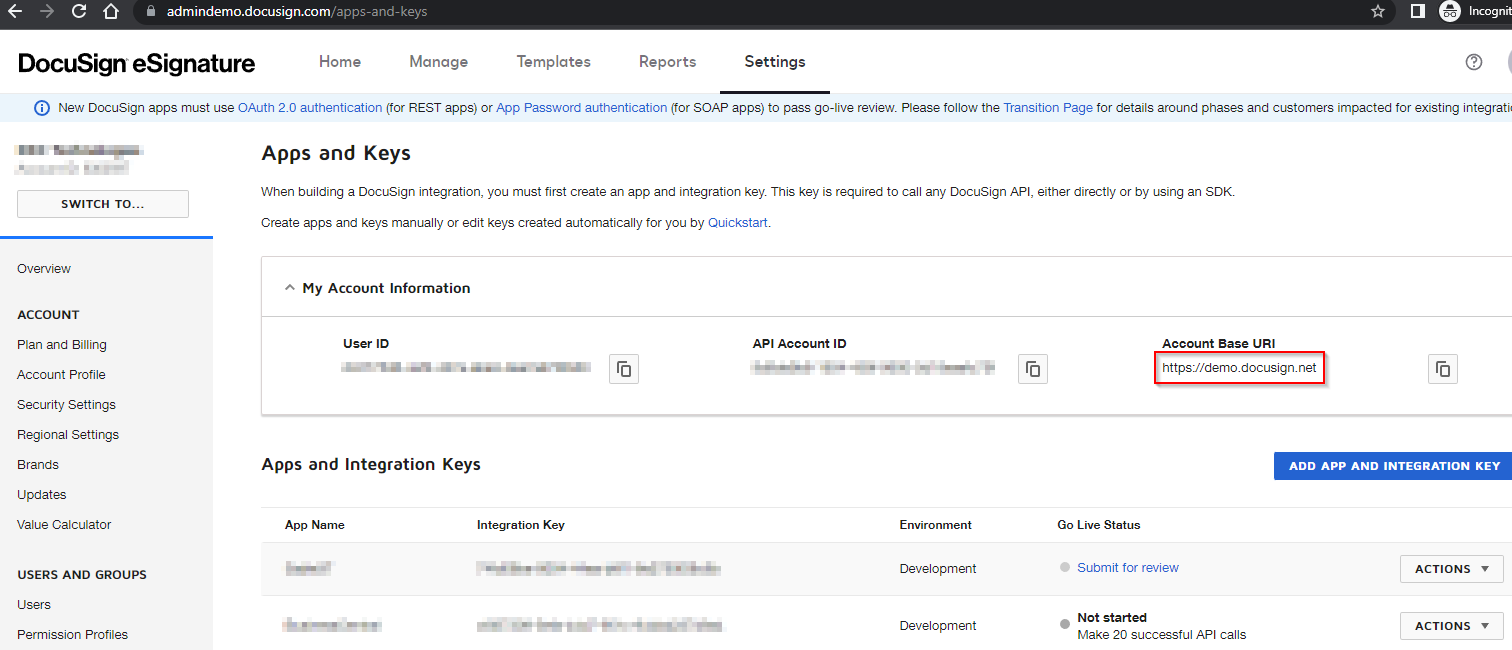
DocuSign will provide the web address utilized to initiate the connection to your DocuSign account. Two variants of this field value will be used; one for a development or non-production instance and the second for your production instance.
Navigate to Apps and Keys from the DocuSign admin portal and copy the Account Base URL to place in this field.
Example: https://demo.docusign.net
Enter the DocuSign OAuth server URL. Example: account-d.docusign.com
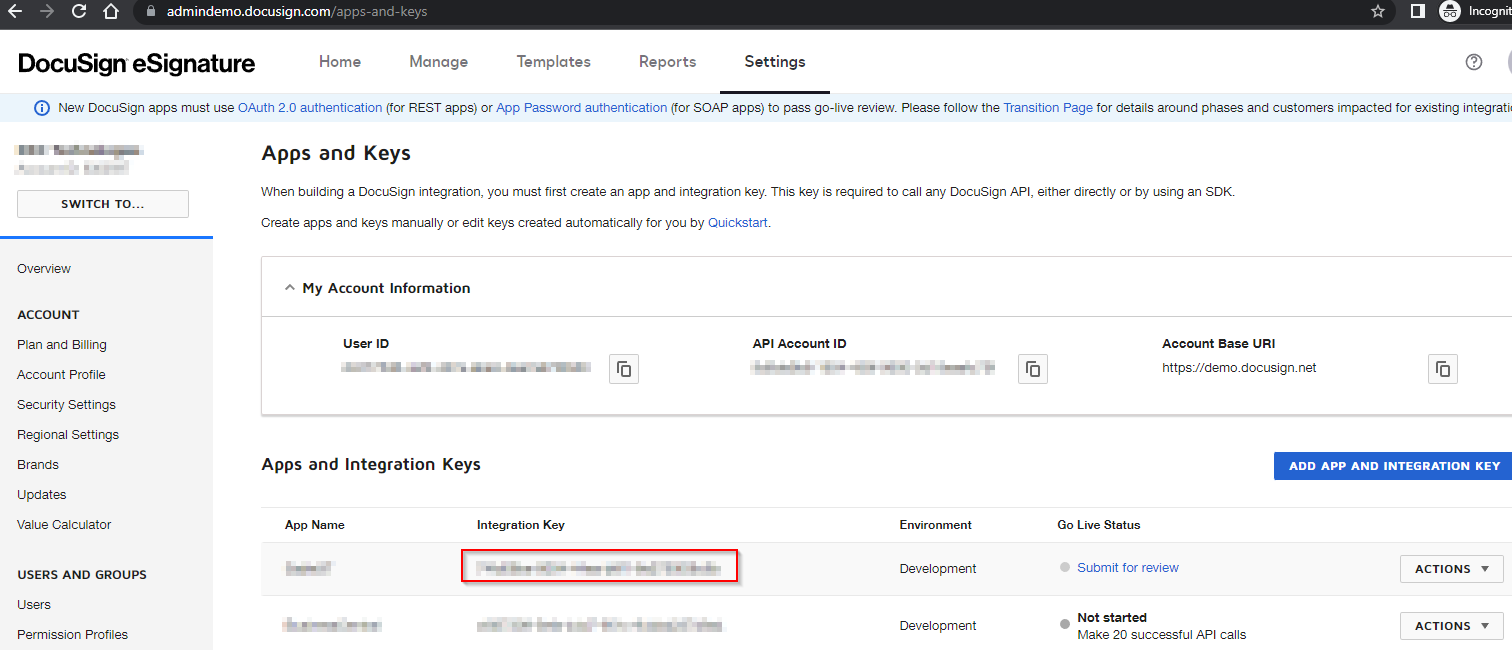
An integrator key is a unique identifier for each DocuSign account that is used for integration into another third-party system. It is used for all API calls to DocuSign. This field value is provided by DocuSign in their Administration area.
The integrator key value must be configured as a manual secret within a key vault, with the key vault parameters defined in FinOps. The integrator key can then be selected from the list of available key vault secrets
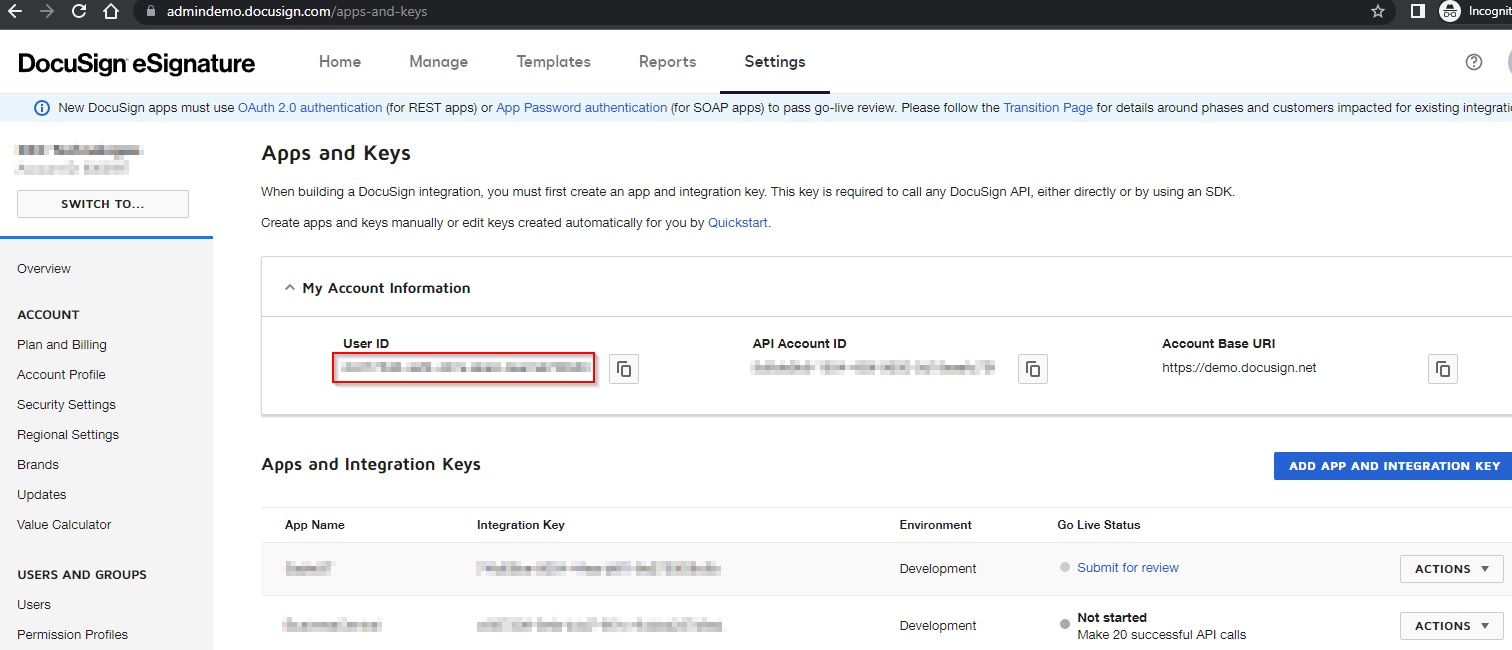
Navigate to Apps and Keys from the DocuSign admin portal and copy the User ID.
This user will need to have administration rights on the connected DocuSign account.
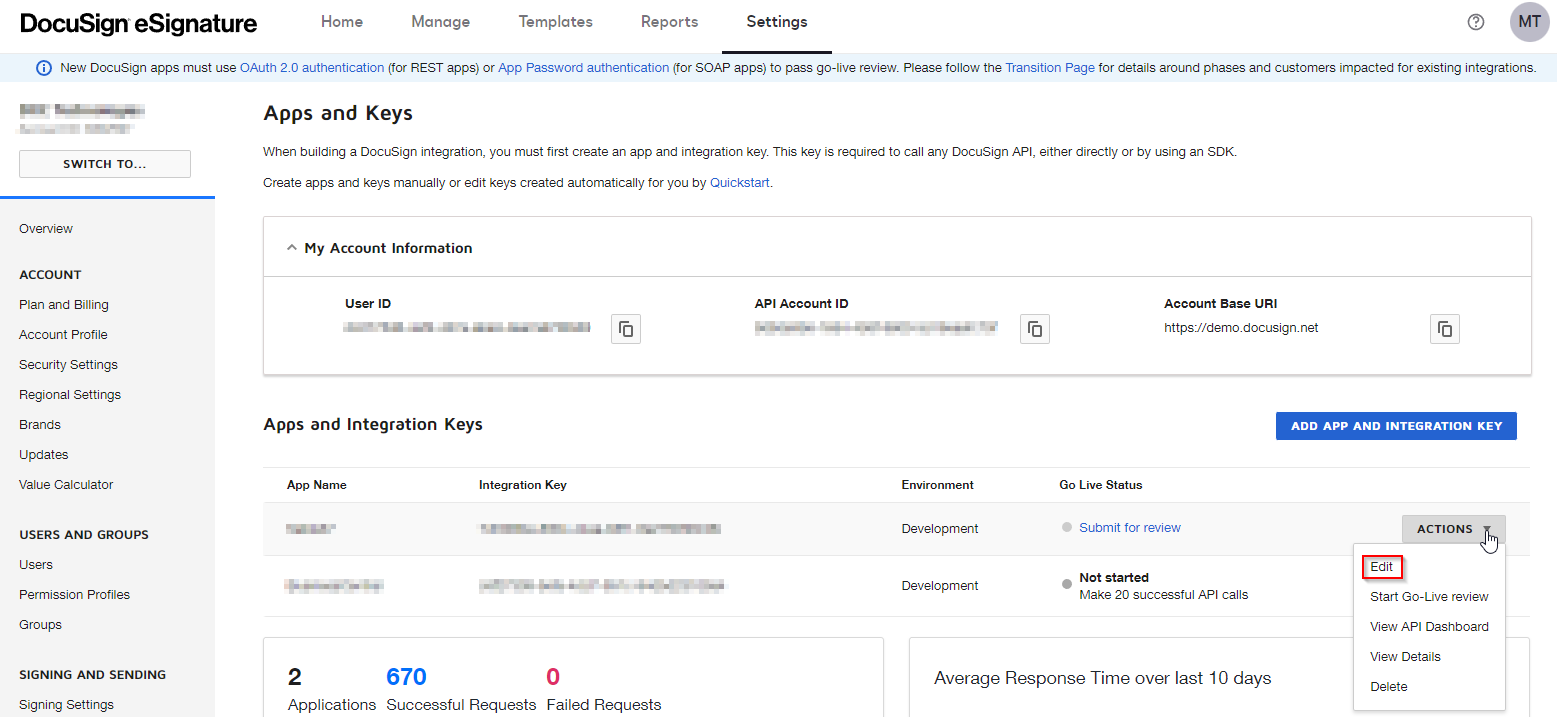
The RSA private key is generated within DocuSign from the Apps and Keys administation page. Select the live app, then Actions > Edit.
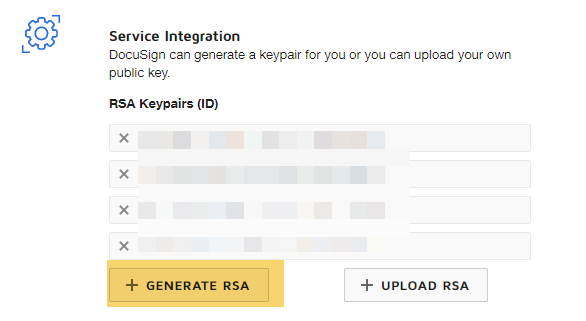
Under authentication, select Generate RSA. This will provide you with a once off private key value which should be recorded.
The RSA private key value must be configured as a manual secret within key vault. Due to the length of the key this cannot be stored directly in the key vault, instead the RSA private key can be stored as a private text file within blob storage. A SAS URL is then created for the file. This URL is stored as a manual secret in the key vault.
The key vault parameters are then defined in FinOps, after which the integrator key can be selected from the list of available key vault secrets in DocuSign parameters
After the OAuth2.0 values have been defined it is neccesary to grant consent for the authentication. This can be achieved by selecting Grant consent at the top of the page.
Select Yes to capture the DocuSign error messages when they occur. The messages will appear on the Exeptions page within the DocuSign integration.
The errors will allow for investiation and resolution by an administrator.
When working within the parameters form, the web services UI will be varied both across environments and across regions. The test environments will have a working services connection by connecting to the following: https://demo.docusign.net . This is regardless of the region of the business.
When moving to a production environment, you must update your integration to use the right base URL for API calls instead of https://demo.docusign.net/restapi . The base URL will vary, depending on the DocuSign account being used. Each registered DocuSign user for your application can access one or more accounts. Each account has an associated base URL. Currently, the production base URLs include: www.docusign.net, na2.docusign.net, eu.docusign.net, etc. Additional base URLs are added regularly.
The updates FastTab provides the details regarding the frequency of updates between the two systems.
| Field | Description |
|---|---|
| Status update time overlap | The update Update document status periodic task must be set up to run, as a minimum, every 15 minutes. When this batch process runs, it will send DocuSign a time value and request all document status updates after that time, and up to the time the batch process is run. Dynamics then stores the time the batch process completes. |
Note on Updates: As an example of the batch process for DocuSign, assume the batch process runs at 9:00 a.m. and sent a time of 8:45 a.m. All document status updates between 8:45 and 9:00 would be requested. Dynamics will store a value of 9:00 a.m., so that the next time the batch process runs it would request all document status updates from 9:00 a.m.
There will be instances where the process my take longer to finalize. When this occurs, the finalization time will be recorded and will be used as the initialization time at the next batch process run. This is why the field has been provided.